


Introduction
Welcome to our Rust journey! Today, we're going to build a CLI-based password vault, a project that not only helps you understand Rust better but also gives you a nifty tool for managing your passwords. Let's dive in!
The program you'll build below provides a basic command-line interface (CLI) for managing a password vault, allowing users to add, list, search, and quit operations.
Setup
Our project consists of two main files: main.rs and pentry.rs. The main.rs file is the heart of our application, handling user input and displaying information. On the other hand, pentry.rs takes care of the password entry data structure and file operations.
We also have the Cargo.toml where we included the dependencies:
[dependencies]
serde = { version = "1.0", features = ["derive"] }
serde_json = "1.0"
"Serde is a framework for serializing and deserializing Rust data structures efficiently and generically." - Crates.io
Step-by-step Guide
The main.rs File
Let's begin with importing the necessary modules and functions from pentry.rs.
mod pentry;

use crate::pentry::prompt; // prints out stuff and accept values from the user
use crate::pentry::read_passwords_from_file; // prints out everything that the file has
use crate::pentry::ServiceInfo;
We'll also include a clr() function to clear the terminal screen, enhancing user experience.
fn clr() {
    print!("{}[2J", 27 as char);
}
The next thing I'd like to do is to add ASCII art. This part is not necessary, but as mentioned above, I'd like to enhance the user's experience.
The ASCII art in the println! statements serve as a welcoming banner for our password vault. If you browse for "ASCII art generators" you'll find many sites that can create your "art" for you.
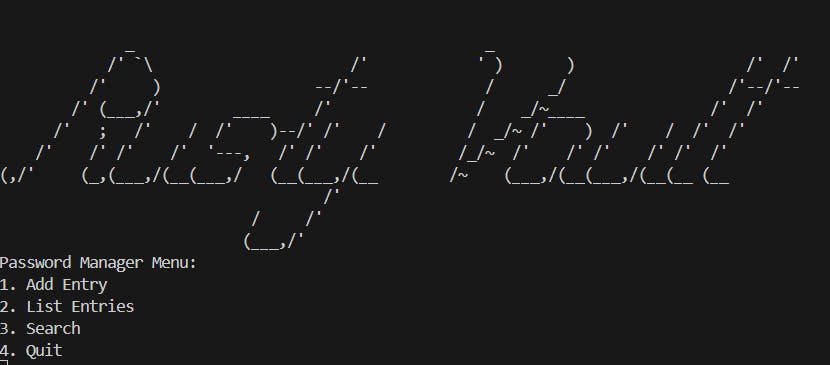
Following this, we enter a loop presenting the user with a menu to add entries (1), list entries (2), search for entries (3), or quit the application (4).
loop {
        println!("Password Manager Menu:");
        println!("1. Add Entry");
        println!("2. List Entries");
        println!("3. Search");
        println!("4. Quit");

        let mut choice = String::new();
        std::io::stdin().read_line(&mut choice).unwrap();
.
.
.
}
1.Adding an Entry: When the user chooses to add an entry, they are prompted to enter the service name, username, and password. This information is then encapsulated in a ServiceInfo struct and written to a file, ensuring persistence.
match choice.trim() { // trim the choice, cause for example there might be spaces and match it with... 1, 2, 3, or 4 or invalid
            "1" => {
                clr();
                let entry = ServiceInfo::new( // ServiceInfo is a struct, you can find it in pentry.rs
                    prompt("Service :"),
                    prompt("Username :"),
                    prompt("Password :"),
                );
                println!("Entry added successfully.");
                entry.write_to_file(); // This function is to ServiceInfo
            }
Here you can see the ServiceInfo, bare with me, we're going to explain this part later in this guide.
2.Listing Entries: This option reads all saved entries from the file and displays them to the user.
"2" => {
                clr();
                let services = read_passwords_from_file().unwrap_or_else(|err| { // services is going to be a vector
                    eprintln!("Error reading passwords: {}", err);
                    Vec::new()
                });
                for item in &services {
                    println!(
                        "Service = {}
                        - Username : {}
                        - Password : {}",
                        item.service, item.username, item.password
                    );
                }
            }
When a user selects this option, the program performs the following actions:
Clears the Terminal Screen: The
clr()function is called to clear the terminal screen, providing a clean interface for the user to view the listed entries.Reads Password Entries from File: It attempts to read all saved password entries from a file using the
read_passwords_from_file()function. This function returns a vector ofServiceInfostructs, each representing a saved entry (service name, username, password). If an error occurs during file reading (e.g., the file doesn't exist or is inaccessible), it prints an error message to the standard error (eprintln!) and returns an empty vector (Vec::new()).Lists All Entries: It iterates over the vector of
ServiceInfostructs. For each item (entry) in the vector, it prints the service name, username, and password to the terminal. This allows the user to view all the saved entries in the password vault.
3.Searching: Users can search for a specific service's credentials by entering the service name.
"3" => {
                clr();
                let services = read_passwords_from_file().unwrap_or_else(|err| { // this is the same as above
                    eprintln!("Error reading passwords: {}", err);
                    Vec::new()
                });
                let search = prompt("Search :");
                for item in &services {
                    if item.service.as_str() == search.as_str() { // ensure the search is a string and search...
                        println!(
                            "Service = {}
                            - Username : {}
                            - Password : {}",
                            item.service, item.username, item.password
                        );
                    }
                }
            }
When a user selects this option, the program executes the following steps:
Clears the Terminal Screen: The
clr()function is invoked to clear the terminal screen.Reads Password Entries from File: It attempts to read all saved password entries from a file using the
read_passwords_from_file()function. This function returns a vector ofServiceInfostructs, each containing the saved entry details (service name, username, password). If an error occurs during file reading (e.g., the file doesn't exist or is inaccessible), it prints an error message to the standard error (eprintln!) and returns an empty vector (Vec::new()).Performs the Search: The user is prompted to enter a search term using the
prompt("Search :")function. The program then iterates over the vector ofServiceInfostructs. For each entry, it checks if the service name matches the user's search term. If a match is found, it prints the service name, username, and password to the terminal.
4.Quitting: Exits the loop, effectively closing the application.
 "4" => {
                clr();
                println!("Goodbye!");
                break;
            }
            _ => println!("Invalid choice."),
This code segment is responsible for handling the user's input in the main menu of the password manager. Specifically, it covers two cases:
When the user inputs "4", the program performs the following actions:
Clears the terminal screen by calling the
clr()function.Prints a farewell message, "Goodbye!", to the terminal.
Exits the loop (and thus, the program) by executing the
breakstatement.
For any other input that does not match the valid choices ("1", "2", "3", or "4"), the program prints an error message, "Invalid choice.", to the terminal. This serves as feedback to the user that their input was not recognized and prompts them to make a valid selection from the menu.
The pentry.rs File
Do you remember when I mentioned the "Adding an Entry" on the above section?! Well, now it's time to talk about it! I'm going to create another file, the pentry.rs file. This file defines the ServiceInfo struct and its methods for handling password entries.
In particular, the ServiceInfo struct represents a single entry in our password vault, containing the service name, username, and password. It includes methods for creating a new instance, reading from and writing to a JSON file, and prompting the user for input.
Let's start:
First things first, we need to add some crates.
use serde::{Deserialize, Serialize};
use std::fs::File;
use std::fs::OpenOptions;
use std::io;
use std::io::BufRead;
use std::io::Write;
The next part defines a Rust struct named ServiceInfo that represents the data structure for storing individual password entries in the password vault.
Each ServiceInfo instance contains three public fields: service, username, and password, all of which are strings.
The #[derive(Debug, Serialize, Deserialize)] line above the struct declaration automatically implements the Debug, Serialize, and Deserialize traits for the ServiceInfo struct. This enables instances of ServiceInfo to be easily debugged (printed out for testing purposes), serialized into JSON format, and deserialized from JSON format, leveraging the functionality provided by the serde crate.
#[derive(Debug, Serialize, Deserialize)]
pub struct ServiceInfo {
    pub service: String,
    pub username: String,
    pub password: String,

}
Now let's define two methods associated with the ServiceInfo struct.
The first method, new, is a constructor that takes three strings (service, username, and password) and returns a new instance of ServiceInfo with those fields populated.
The second method, from_json, takes a JSON string and attempts to deserialize it into an instance of ServiceInfo using Serde's from_str function. If the deserialization is successful, it returns the ServiceInfo instance; otherwise, it returns an error.
impl ServiceInfo {
    pub fn new(service: String, username: String, password: String) -> Self {
        ServiceInfo {
            service,
            username,
            password,
        }
    }
    pub fn from_json(json_string: &str) -> Result<Self, serde_json::Error> {
        serde_json::from_str(json_string)
    }
Let's keep working on the ServiceInfo.
We'll define a method from_user_input for the ServiceInfo struct. This method prompts the user to enter a password entry's details: service, username, and password. Each input is read from the standard input (stdin), trimmed to remove any leading or trailing whitespace, and then used to create a new instance of ServiceInfo using these trimmed strings.
The method uses println! to display prompts to the user and io::stdin().read_line(&mut variable) to capture the user's input into the respective variables. If reading the input fails, an error message is displayed.
Finally, it returns a new ServiceInfo instance populated with the user-provided values.
#[allow(dead_code)]
pub fn from_user_input() -> Self { // here is where we accept the values from the user
        println!("Enter Password Entry:");
        let mut service = String::new();
        io::stdin()
            .read_line(&mut service) //accept user's input as a service
            .expect("Failed to read line");              // if there is any error print it

        println!("Enter Username:");
        let mut username = String::new();
        io::stdin()
            .read_line(&mut username)
            .expect("Failed to read line");

        println!("Enter Password:");
        let mut password = String::new();
        io::stdin()
            .read_line(&mut password)
            .expect("Failed to read line");

        ServiceInfo::new(
            service.trim().to_string(),
            username.trim().to_string(),
            password.trim().to_string(),
        )
    }
We will need two more methods in the ServiceInfo struct for serializing its instances to JSON and writing them to a file.
The to_json method converts the ServiceInfo instance into a JSON string, leveraging Serde's to_string function. If serialization fails, it panics with a message.
The write_to_file method formats the JSON string with a newline and attempts to append it to a file named "passwords.json". It uses OpenOptions to open the file, creating it if it doesn't exist, and appending to it if it does. If writing to the file fails, it logs an error message; otherwise, it confirms successful writing.
    fn to_json(&self) -> String { // this functon is to read to json (this is similar to the function we wrote above)
        serde_json::to_string(&self).expect("Failed to serialize to JSON")
    }

    pub fn write_to_file(&self) {
        let json_output = format!("{}\n", self.to_json());

        match OpenOptions::new()
            .create(true)
            .append(true)
            .open("passwords.json") // the name of the file is passwords.json
        {
            Ok(mut file) => {
                if let Err(e) = file.write_all(json_output.as_bytes()) { // here is where we're actually writing to the file
                    eprintln!("Error writing to file: {}", e);
                } else {
                    println!("Successfully wrote to passwords.json");
                }
            }
            Err(e) => eprintln!("Error opening file: {}", e),
        }
    }
Outside of impl ServiceInfo we'll have a few more functions.
This function, read_passwords_from_file, opens a file named "passwords.json" and reads its contents line by line. Each line is expected to be a JSON string representing a ServiceInfo object. It attempts to deserialize each line into a ServiceInfo instance using the from_json method. Successfully deserialized instances are collected into a vector. The function returns this vector, encapsulated in a Result to handle potential I/O errors that might occur during file operations.
pub fn read_passwords_from_file() -> Result<Vec<ServiceInfo>, io::Error> {
    let file = File::open("passwords.json")?;
    let reader = io::BufReader::new(file);

    let mut services = Vec::new();

    for line in reader.lines() {
        if let Ok(json_string) = line {
            if let Ok(service_info) = ServiceInfo::from_json(&json_string) {
                services.push(service_info);
            }
        }
    }

    Ok(services)
}
Last but not least, this function, prompt, takes a string slice prompt as input and displays it to the user. It then flushes the standard output to ensure the prompt is visible. The function waits for the user to input a line, reads this line into a string, trims any leading or trailing whitespace, and returns the trimmed string. This utility function is particularly useful for interacting with users in a command-line environment, streamlining the process of collecting input.
pub fn prompt(prompt: &str) -> String {
    print!("{}", prompt); // print the prompt we received, which is a string
    io::stdout().flush().unwrap();

    let mut input = String::new();
    io::stdin().read_line(&mut input).unwrap();

    input.trim().to_string()
}
Woohoo, are you still here? Congrats 🥳
You just finished building a CLI password vault in Rust.
To run it: cargo run
Check the full code on GitHub.
Conclusion
Congratulations! You've built your password vault in Rust. This project not only showcases Rust's capability in creating CLI applications but also demonstrates handling file operations, user input, and serialization/deserialization. As you continue to explore Rust, consider adding new features to your vault, such as password encryption, to further enhance your learning and the application's utility.
Rust is a powerful language with a steep learning curve, but projects like these provide practical experience that solidifies your understanding. Keep experimenting, and happy coding!
P.S. Stay tuned for my next article where we're going to connect this program with SQLite!
👋 Hello, I'm Eleftheria, Community Manager, developer, public speaker, and content creator.
🥰 If you liked this article, consider sharing it.