Figma Tutorial: Create a Post Page For a Social Media App | Part 2/3
Your 1st Project in Figma, Beginner's Friendly, Design
Before you continue please take a couple of minutes to read Part 1 which was about wireframing. This post will cover the basics of design.
Step 1: Creating Pages
This is our basic wireframe (Image 1).
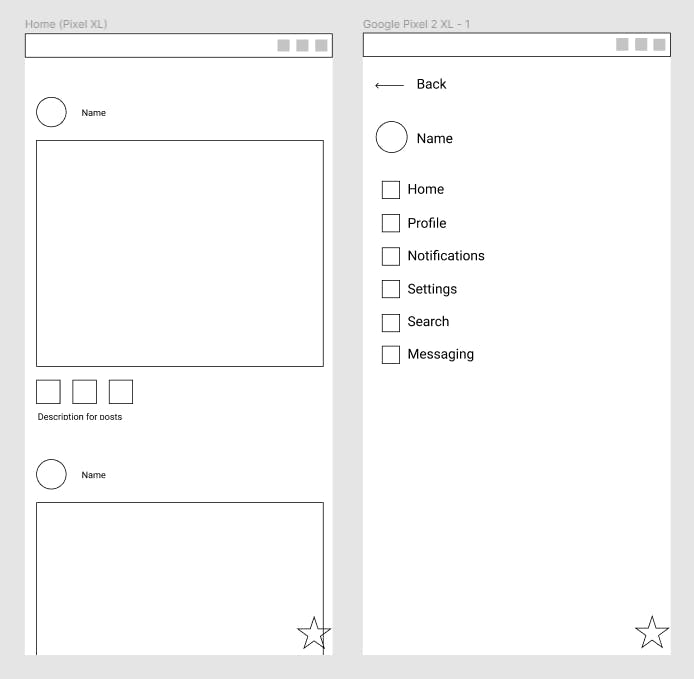 Image 1
At the top left menu, you'll find the button "Pages +", click on "+" to add a Page, name this page "Designs". Let's build the home page. I need to have a frame, so I'll hit F and then Google Pixel 2 XL from the right menu. I'll then hit R to create a rectangular, I'll place it in the center and I'll make the corner curvy. Then I'll hit O (for circles) and I'll add a 40x40px circle above the rectangular. Hint: these will soon hold images! To make sure you placed it in the center you can use the "Layout Grid" from the right menu (Image 2). If you want to remove it use ctrl+shift+4.
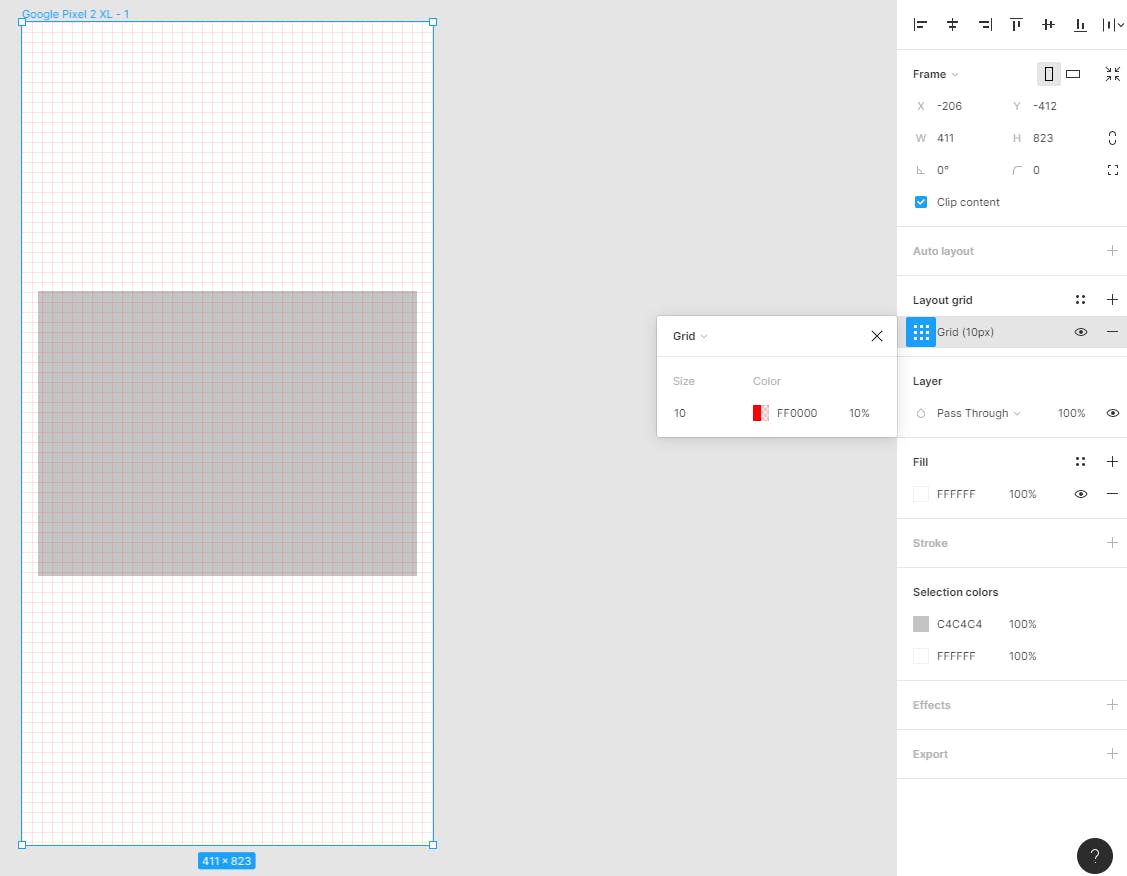 Image 2
Step 2: Adding the images
Use ctrl+shift+K to add images from a local folder and then place them to the rectangular and the circle (Image 3).
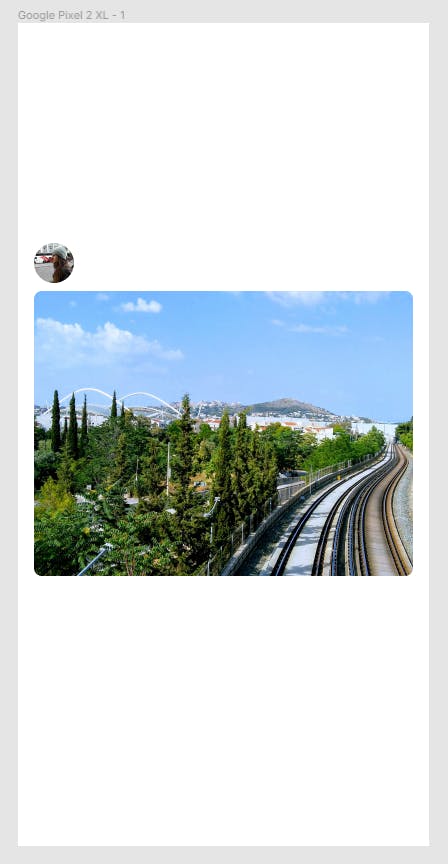 Image 3
Next to the avatar (circle) hit T to add some text. Do the same above the rectangular. Feel free to style the text as you like.
If you want to make cohesive and multiple changes to the text, colors, etc I'd suggest you using styles. To do so, click on a text field and then on the right menu click the 4 dots on the Text. Click the "+" icon and give your style a name. I named mine "Body text" (Image 4).
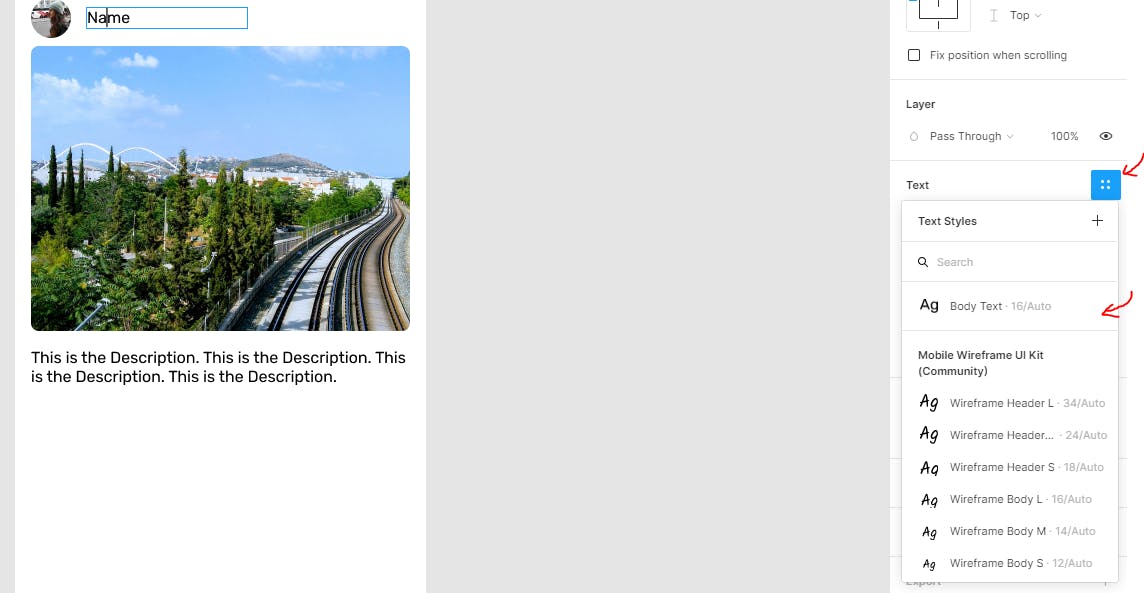 Image 4
Step 3: Auto-layout
We will briefly discuss the auto-layout and soon you'll understand the importance of it. Auto-layout can work either horizontally or vertically (not both). Select the name and the avatar, hit Shift+A and from the right menu you'll find the auto-layout. Adjust it in the center (Image 5).
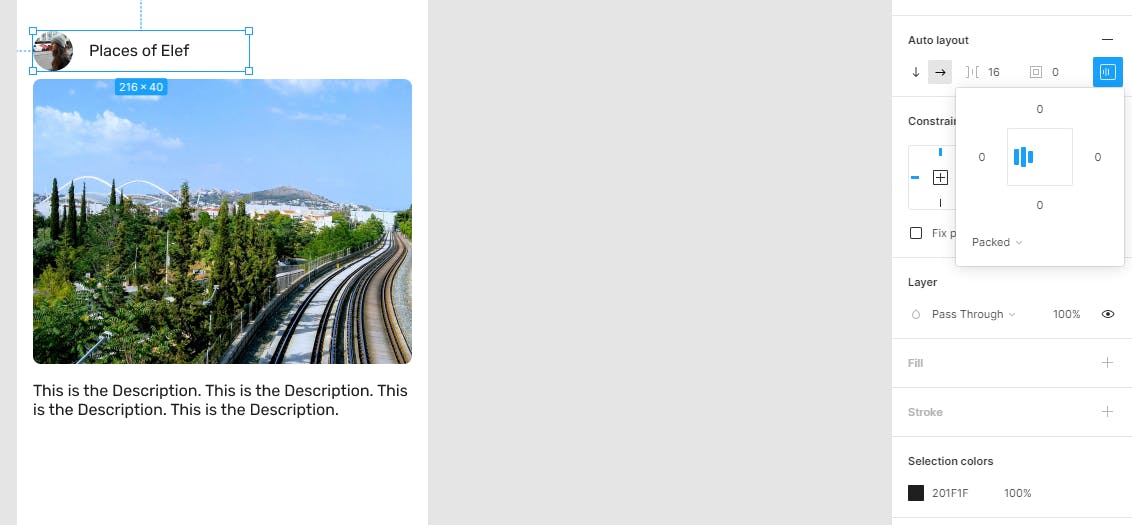 Image 5
Do the same with all the elements of your page.
Step 4: Create components
Components help you to create and manage things easier and faster! It can be a great asset for the whole team. To create a component select everything on your layout and click the component icon (it is placed in the top center of your page) or click ctrl+alt+K.
Create a new Page and name it "Components". Go back to the "Designs" page and right-click on the component, select "Move to Page" -> "Components" (Image 6).
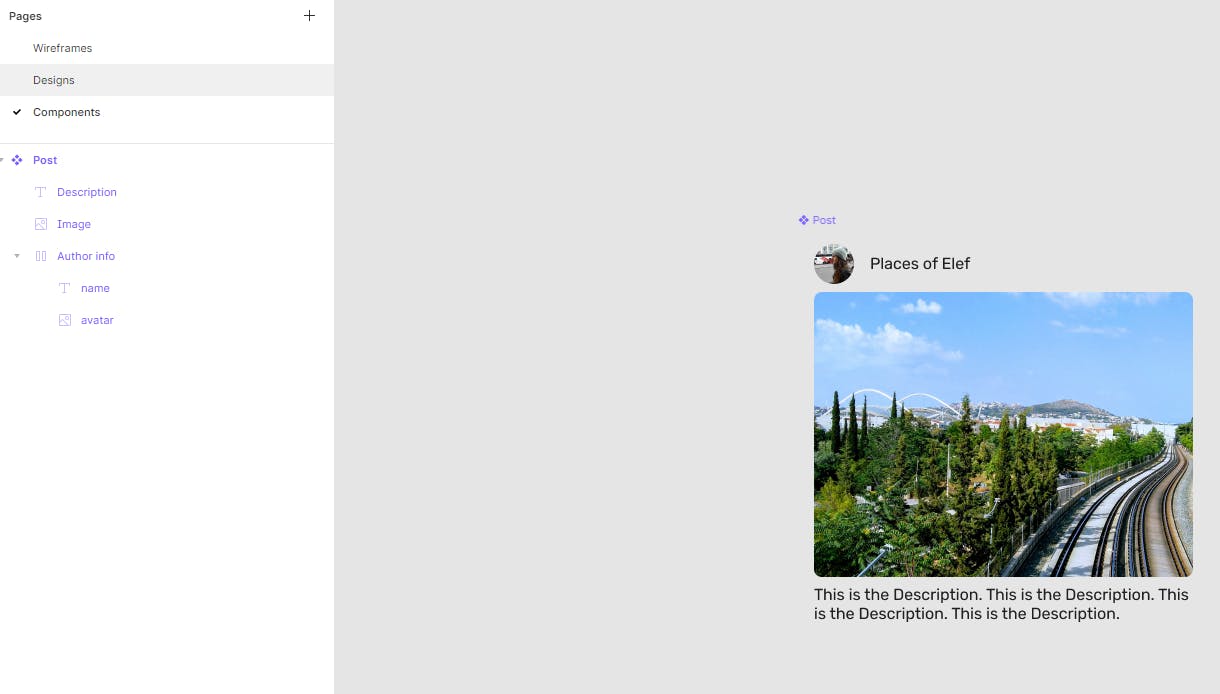 Image 6
You can now have access to it from the "Assets" panel on the left menu. You can drag this asset to the Frame. Hit ctrl+D to duplicate it twice. That's it :)
I also made a Frame, with an auto-layout that includes the 3 posts. To be able to see the whole length of the blogs uncheck from the right menu "Clip Content" (Image 7).
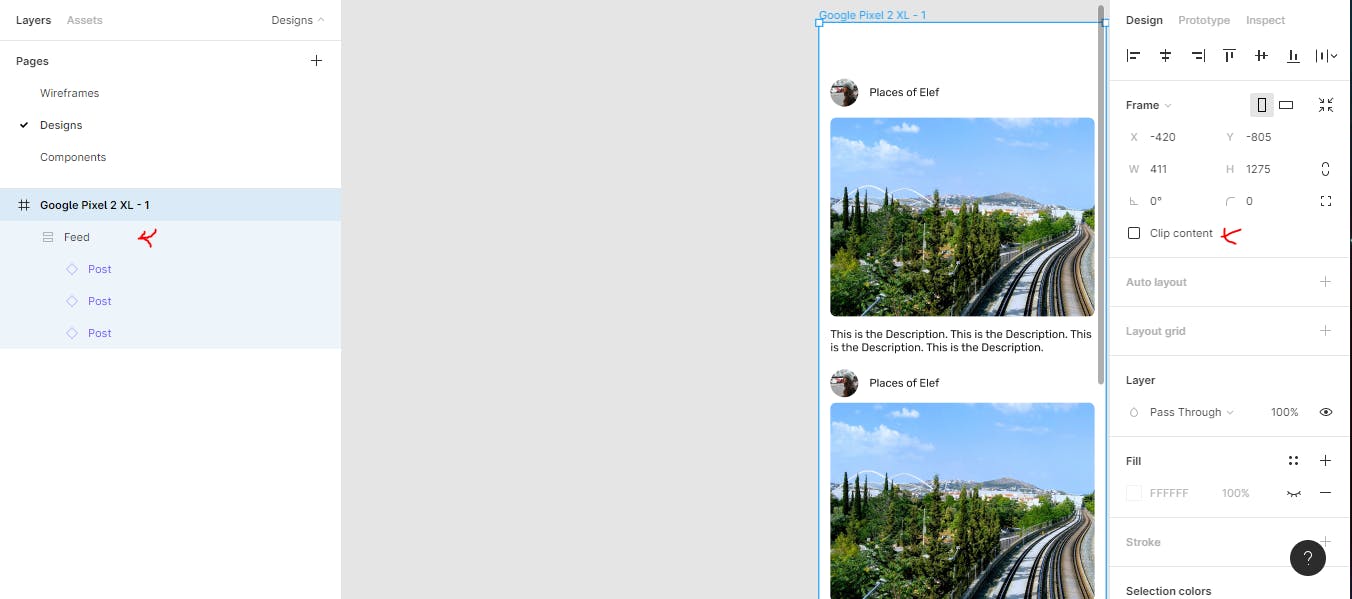 Image 7
And I added some new images to make the app feel a bit more real (Image 8).
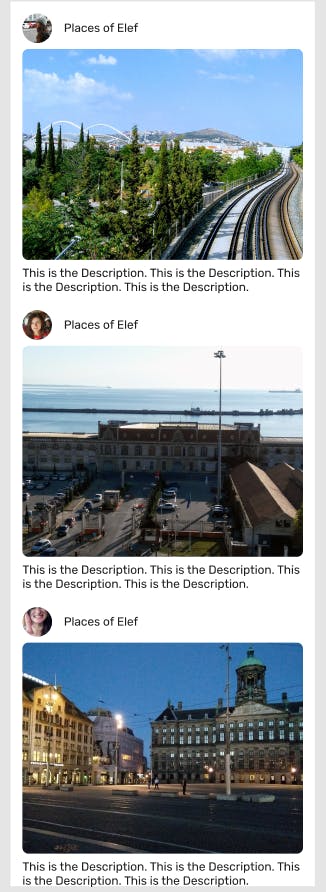 Image 8
Step 4: Navigation Bar and Icons
I will create my own icons and then I'll use them for the navigation bar.
Menu Icon To do so I'll make a new Frame (32x32) and since we want precision I'll use shift+2 to zoom in. Next, I'll use the Pen tool to create a line and I'll duplicate it twice (this is vector based). The width will be 14px and the corners will be round. My shape is ready, I'll turn it into a component and move it to the components.
Search Icon Then I'll make a magnifying glass (search icon). Start as we did before, make a 32x32 Frame and use the eclipse tool to make a 16x16 circle, then switch to the filling property (shift+X), use the pen tool to draw a line under the circle. Then select both shapes and from the top menu click Boolean Groups -> Union Selection. Turn it into a component and move it to the components section (Image 9).
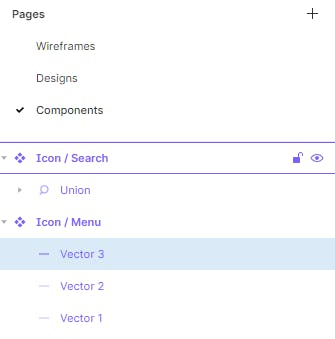 Image 9
Navigation Bar Create another Frame (411x80), this will be the navigation bar, and from the assets add the menu and search icons (Image 10).
 Image 10
I also added a logo (photo) and 3 more icons. Finally, I turned it into a component (Image 11).
 Image 11
Now, go back to the Designs layer and add the NavBar at the top of your design (Image 12).
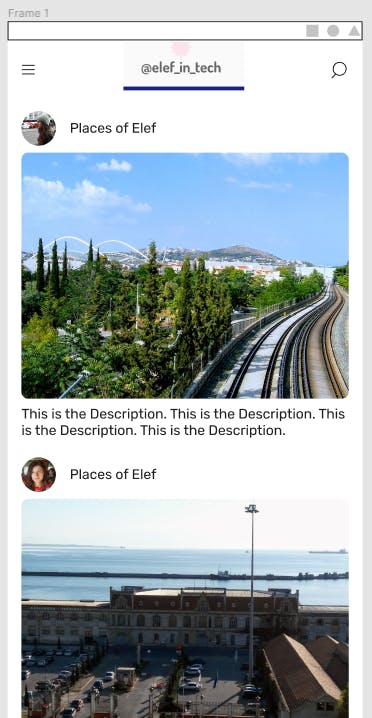 Image 12
Step 5: Add an action button
This action button will be used to add a post.
I'm not going to into details but I'll make a new Frame and in there I'll make a simple button, I'll turn it into a component and move it to the Components. Then I'll add it from the assets to the Designs. I'll make the nav-bar and the action buttons "sticky" so they can't be moved or scrolled and the rest of the frame is going to have a vertical scroll (Image 13). That's it! you made it!!
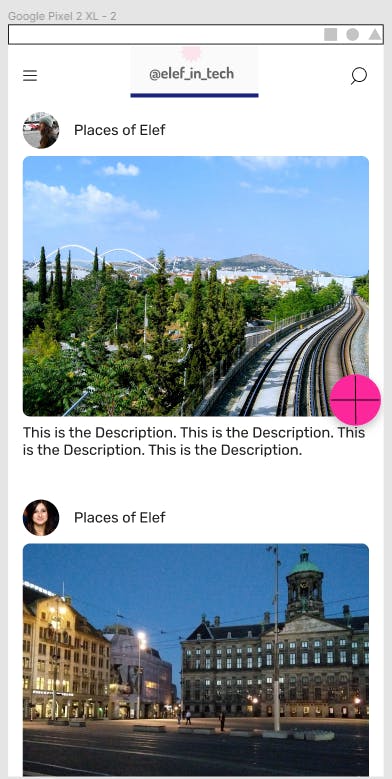 Image 13
Are you still with me? If so, congratulations!! Read part 3 too!
The hotkeys I used in order are:
- F -> creates a Frame
- R -> creates a Rectangular
- shift+O -> creates a Circle
- ctrl+shift+4 -> removes the Grid
- ctrl+shift+K -> open images from a folder
- shift+A -> creates auto-layout
- ctrl+alt+K -> creates a component
- shift+2 -> zooms in a Frame
- shift+x -> stroke (removes the fill)
👋Hello, I'm Eleftheria, a front-end developer, master student, freelancer, public speaker, and chocolate lover.
🥰If you liked this post please share.
🍩Would you care about buying me a coffee? You can do it here: www.buymeacoffee.com/elef but If you can't that's ok too!
🙏It would be nice to subscribe to my Youtube channel. It’s free and it helps to create more content.
